Added Chelsea’s presentation PDF to the wiki:
Just studied the manual, which I’ll load on the wiki when I know how - got PDF from HPC. Realised that you can’t adjust datum settings & focus height until an image has been downloaded from PC to machine . . . so, that’s what I was doing wrong last night!
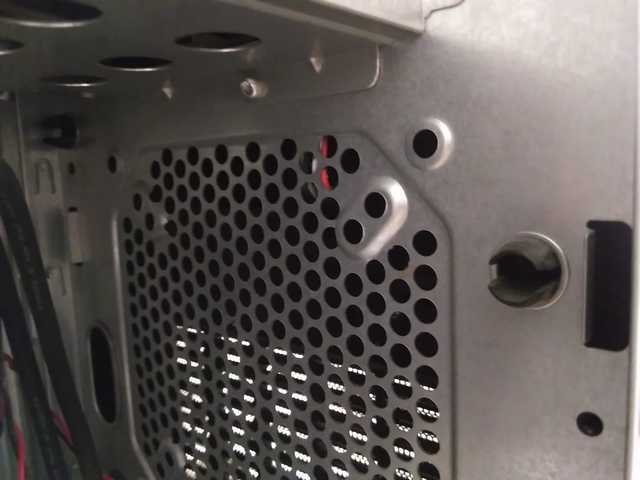
It took ages last night before we could get the laser-cutter’s attached PC to power up, & we didn’t do anything special to make it work finally - just random. I popped in just now, & the PC won’t turn on again. I took a side off the case, expecting to see a power connection (hopefully loose), but found a metal grill blocks access to the power switch, which is in between that & the front facia - see photo attached. This needs fixing before we can make progress with the laser-cutter … . help!
Ah, I had trouble turning it on the other week and thought I was just being stupid and had forgotten how to press buttons properly… (which would be bad in my line of business)
In any case, will take a look when in next. I have a horrible feeling it could be something funny with the motherboard or power supply, but hopefully I’m wrong and it is just a mechanical switch thing.
Tagging @paul123 as he kindly donated the machine and may have some ideas also.
Well, I thought I was having a thick turn last night, but changed the mains lead & used a socket that was proven to work. @Caz joined in as well, with no more luck. After a 2nd visit with problems, I’m now sure it’s not just me.
So, any help is much appreciated, @9600 & @paul123. We’d hoped to make an extra visit next week, when @caz can stay longer, but without a functioning PC, there’s no point.
I’m afraid I don’t have any suggestions today - I hadn’t seen that symptom before I brought the machine to the space.
I realise a reliable machine is needed for the laser cutter so maybe we should use one of the other PCs instead(?).
Recent history of the PC for reference:
Original fault was “hanging soon after power on”. I found the heatsink had come away from the CPU so refitted it with new thermal pad. Linux was then installed and booted fine a couple of times.
Then Windows was put on just before the laser cutter arrived.
This ‘power on’ issue makes me think something more serious / intermittent occurred as a result of the heat sink coming off. I hope it’s just the switch or it’s connection to the motherboard though. Note the front panel / power button haven’t been dismantled, or given issues before.
I can’t get down for a couple of weeks so won’t be able to help with this soon - sorry.
I think the laser-cutter software is Windows 10, which a lot of the other computers may be too low powered to support, @paul123 & @9600?
No, the computer is running Windows 10 because it didn’t have a licence for any version and so I bought one. The laser cutter software will run on previous versions. I think those old Dell PCs I got have a Windows 7 sticker on them somewhere. If so and we can get an installation DVD, we could put this and Laser Cut on one.
The PC that Paul donated is actually quite powerful and wasted on Laser Cut, so if we could do this and then fix the problem with it, it could be used for something more demanding.
I called in to the space on the way home from work just now and brought a PC tower that Tim Harbour was getting rid of a while back, which has no hard disk or RAM, but does have a Windows XP Pro license sticker on the back. As it turns out, I didn’t need it.
I had a look at the current PC and there doesn’t seem to be anything wrong with the switch, but this is cabled to a small header on the motherboard, with a sort of pin adapter in between. This looks easy to dislodge and I’m hoping that is all it was — a poor connection. The switch doesn’t switch power to the motherboard per se, as it has this all the time, as indicated by the permanently lit green LED on it. Instead the switch just shorts out two pins to signal to turn the PC on/off.
I tested by turning the computer on/off about 15-20 times and it worked fine. So hopefully that’s it. if it proves problematic again, try removing the power lead for a minute or so, replace and try again. This seemed to work when I was experiencing issues previously and so it may be that this helped and an issue remains — perhaps with the power supply or motherboard — but hopefully it was just coincidence and/or removing and inserting the mains lead shoogled the innards about enough to make the power switch connection work.
Only time will tell.
In the meantime we should look to find another PC, which doesn’t need to be as powerful, to replace this one with. Then we can re-purpose it for something less critical, but where it’s better used, e.g. to run CAD.
Much as an XP computer would technically suffice, it would be far from ideal given that it’s no longer getting updated, so more prone to viruses etc. So we’d need a Windows 7 or better machine.
Remember: if the current PC stops working, remove the mains lead, wait a minute and re-connect it.
Right. so I’m thinking — and hoping! — that it was just that internal connector…
Tonight was quite frustrating for a while, not seeing how to overcome basic problems, but we just about got there in the end.
Lessons I learned:-
-
On the laser-cutter, I couldn’t get the cursor controls to shift the laser datum point. On the menu, you press to unhighlight LASER, then the cursor controls work fine.
-
In the laser-cutter software, File > Import loads the image & displays it almost full screen. However, it ISN’T within the laser-cutter bed area, nor is it anywhere near. View > Zoom out lots of times to see where the image & work area both are. Instead of selecting all the image & moving it, use the menu column on left of screen - 1 icon is ‘Centre to table’, which puts it in the middle of the work area (laser cutter bed size), & shrinks it so it just fills a small part of the screen. View > Zoom in to make it a workable size to edit (Tools > Unite Lines etc).
I’ve scribbled notes in the laser-cutter manual on the bench - I’ve got an electronic copy of that, so can re-print anytime.
First efforts of laser-cutting . . . .
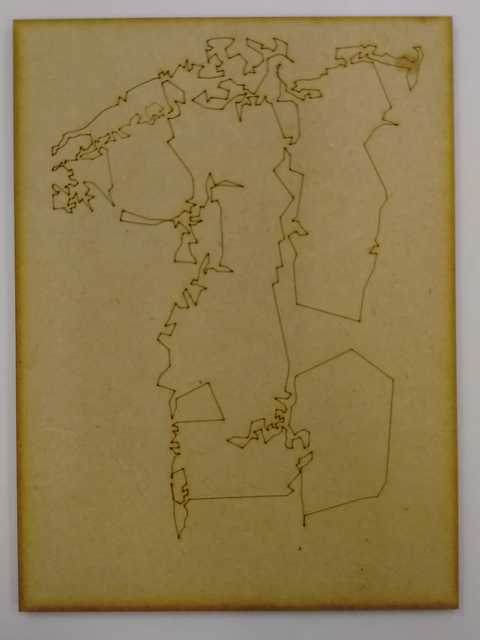
After giving up on a tiny test sampler before finding out what I was doing wrong, I loaded an image produced from a little pen sketch of a figure ages ago, which software had re-interpreted. It was stored as SVG format originally, so could be loaded straight into Inkscape & tweaked at home. I cut it from MDF about 20 x 14 cm . . . . quite happy as a first try ![]()
@Caz also persevered & produced a fab looking dog tag in green acrylic. Shame it was sized for a gigantic beast, rather than her greyhound! Scaling things down is something we’re all having problems with. Still looks good . . . .
@Martin studied all the instructions & learnt from our mistakes, so is hopefully progressing too.
2 Likes
Ah, Chris kept telling us, always press Escape before attempting to jog the cutting head, so it comes out of whatever mode it was in before ![]()
Need to get your wiki access sorted out so that you can edit the notes there…
Sounds like either one of: Inkscape isn’t quite properly set up or export to DXF options aren’t as they should be. You should be able to just draw to scale and e.g. have each nudge be 1mm, then cut to perfect scale.
Not sure what’s going on as we have precisely the same machine and software at work, and use the same settings as provided. Needs looking into and some screenshots of config putting on the wiki.
I got a top tip from Stuart Childs, who works for @9600, doing laser-cutting amongst other stuff. A thicker line can be achieved by de-focusing the laser, ie spacing the laser further from the cutting surface by lowering the bed on which the material sits - think of a bulb lighting a wider area further away, but more dimly,
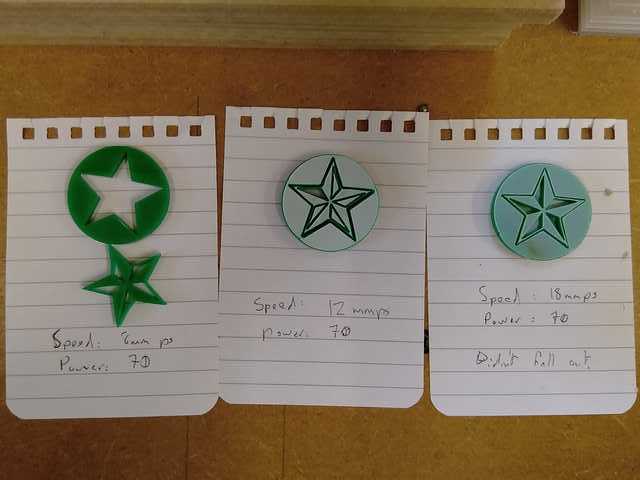
So, I went in this afternoon & did a series of tests: combinations of distance bed lowered from focus point, speed & power. To vary the laser distance, I used multiples of the laser focusing gauge, ie the little acrylic square pieces a few mm thick - 1, 2 or 3 thicknesses. See this test series - I had to re-focus the laser to cut out the overall shape at normal settings, though I used a rectangle prepared for something else, which wasn’t quite big enough, hence shapes were truncated.
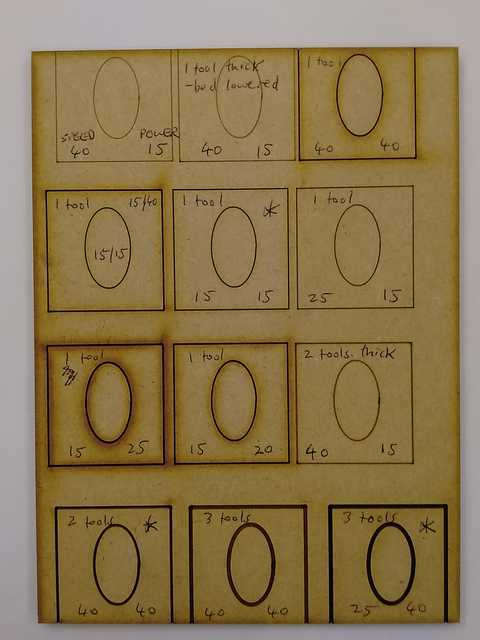
Starting with the top left & going right, then down, I think images 5, 10 & 12 are most effective (asterisked on photo):-
-
1 gauge thickness, speed 15, power 15 - gave a clean line without scorching either side
-
2 gauge thicknesses, speed 40, power 40
-
3 tool thicknesses, speed 25, power 40
-
the overall area was cut through using speed 16, power 90. I need to test whether other settings (eg lower power) still achieve a cut through, but without scorching the perimeter so much.
Having done that test, I compared a (digitally manipulated) figure drawing done normally (speed 40/ power 15)
against a de-focused laser, spaced 2 gauge thicknesses below normal focus position, with speed 40/ power 40.

The laser was focused normally to do the rectangular cut through for both drawings, with speed 16/ power 90.
I think the 2nd image is stronger. Whilst I don’t dislike the random looking scorched areas, this highlights the reason for an additional setting, which I haven’t varied yet: as well as “power”, there’s “corner power”. because the laser slows down very very briefly to change direction, it burns more intensively at every change of direction (rather than a continuous curve). As this image is made up of a large series of straight lines, it’s having to jolt to a stop before turning, and is causing scorching that doesn’t appear in a continuous line - see clean line of elipse.in image 10 (or 4A) above vs slight scorching at corners of square.
Hope all that’s useful to others . . .
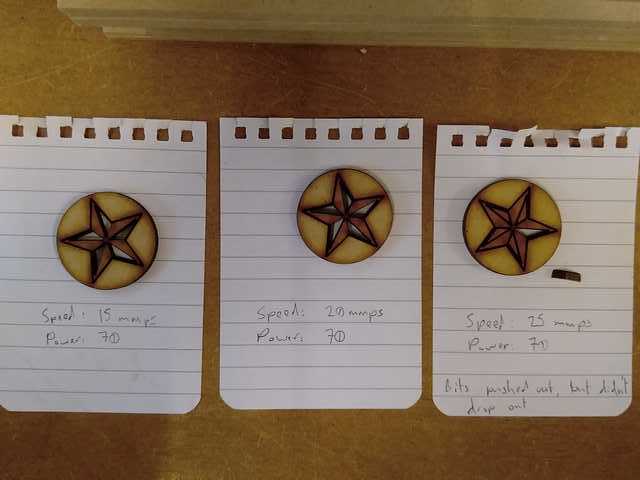
At Chelsea’s initial training session, @davidhayward produced a few test pieces in MDF & acrylic, showing different settings. So here are photos of those tests. Hope the descriptions still relate to the adjacent piece.
There’s now a supply of Dettol Floor Wipes for cleaning the laser-cutter - particularly the metal rails underneath where the sheet materials sits. I haven’t used any yet . . …
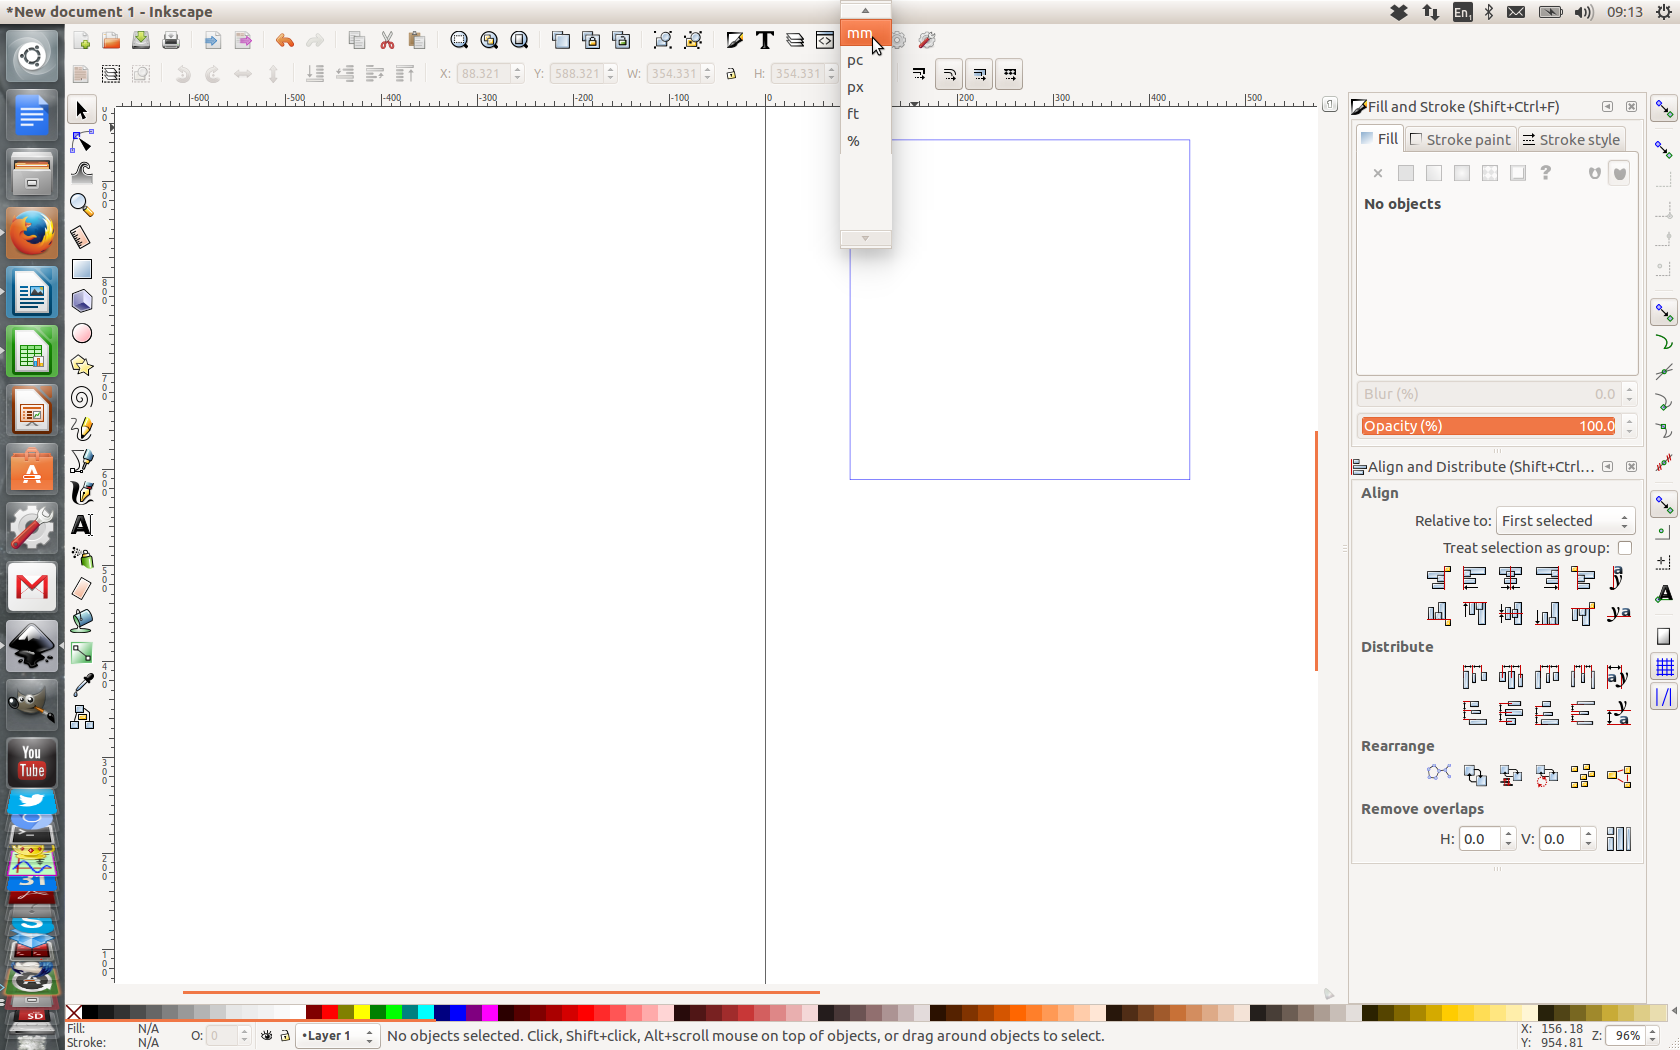
We had a lot of problems tonight with a simple image file @caz created in Inkscape. Despite checking Inkscape settings very carefully, we couldn’t get the right size recognized within Laser System 5.3, the laser-cutter’s software - baffling, but maybe Google will help . . . .
This has happened to me quite a few times. I know you’ve said the Inkscape settings were checked very carefully, but usually i find when I’ve made the drawing I have been doing so in Px when I should have been doing so in mm (show below). If the drawing is completed in Pixels it will throw things off in the laser software as I believe the default unit there is mm.
Help, @ChelseaBack! I was cutting signage for our open day out of corrugated cardboard. Without realising the hazard, I used a piece of card fractionally bigger than the sign, and when cutting through, the frayed spare strip started burning. It was easy to extinguish just blowing it out, but we pressed the Emergency Stop button and now can’t get the laser-cutter going again. Any experience of resetting? Thanks