hi id like to register for the course on the 22nd…Paula 07814047631…cheers
Is there an electronics session this Tuesday eve, @9600. I’m sure it’s simple for lots of people, but I want to wire up 1 or more LEDs to a coin battery (not sure what stuff I’ve got to hand). At the Hebden Royd Annual Town Meeting on Wed, I’d like to present a figure drawing I scored onto clear acrylic sheet, illuminated from the edge with blue LED(s).
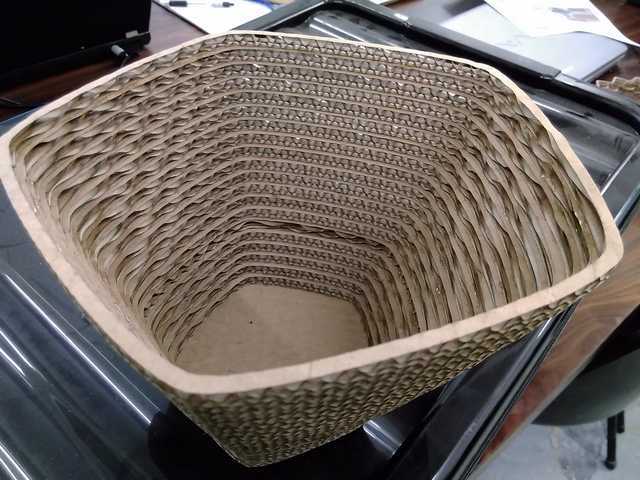
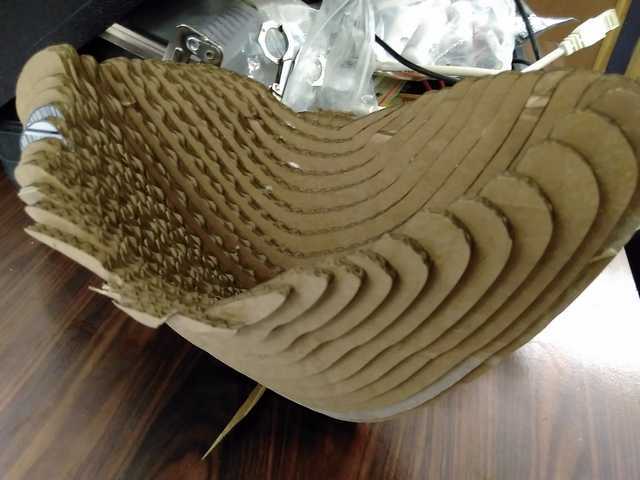
Today, I stuck together an asymmetric oval bowl, made from rings of corrugated cardboard. I’ve also cut parts for another 2 bowls; an intricate paper cut design I downloaded from t’interweb, and a figure drawing onto both poplar & birch plywood. So, gathering together lots of samples to show . . . . I’ll post photos tomorrow. I may cut slices for a bowl from some 5mm acrylic sheet I bought.
@RoboGuy, just realised I hadn’t updated the calendar when I switched this to being a Things Network / IoT / sensor networks meet-up to give it more focus and to get some practical stuff done with this. Updated the calendar now and also removed the event for tomorrow, as I’m not able to get down.
Plan to resume in May and will put together a list of hardware options for anyone who wants to experiment with The Things Network.
I’ll be down Wednesday evening and can discuss your LED project then.
OK, @9600, don’t worry for now. I’m giving a short presentation at Hebden Royd Annual Town Meeting on Wed eve, so was trying to get lots of laser-cut samples together for that. It’s less important now that I’ve just discovered they typically only get about 40 people at that. I’ll take other stuff, & a photo of an Aldi till sign, together with an updated BR flier, promoting the next laser-cutting intro day.
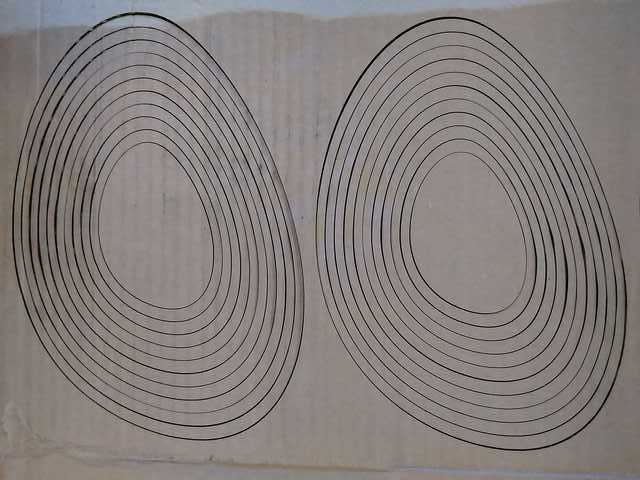
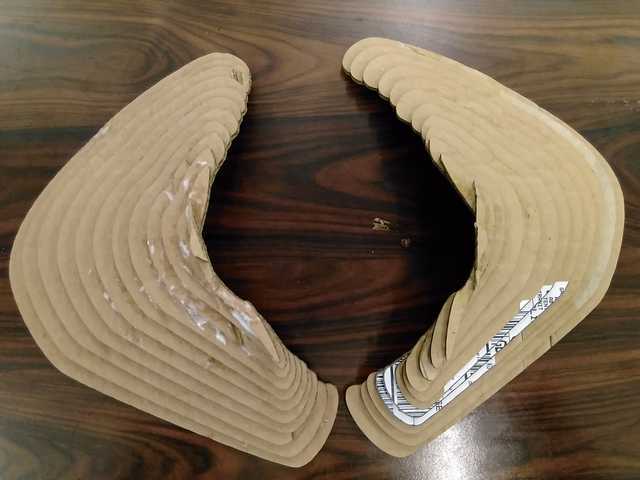
Here’s a bowl, made from horizontal slices with negligible waste material, as shown by the pic before assembly. It would be just as easy to make it from acrylic sheet, but solvent weld would need to be transparent to avoid it detracting from the finished bowl.


1 Like
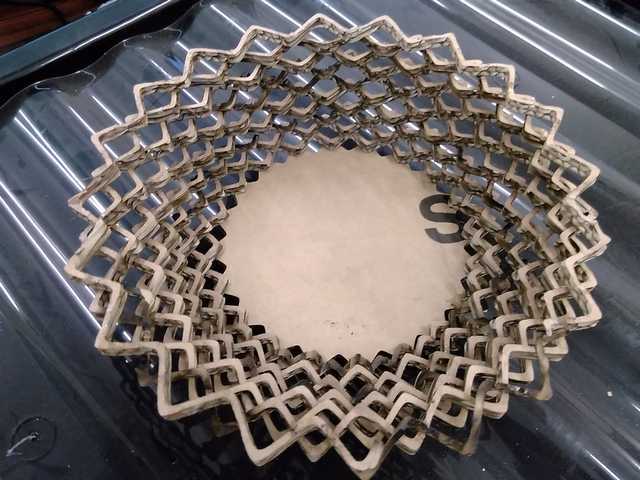
Here’s an intricate design, downloaded from t’interweb & cut from lightweight card. The background colour is just acrylic sheet that I laid it on for the photo. I believe this is the sort of thing some artists are interested in making, A similar approach lends itself to intricate wedding invitations, & concertina format cards for multiple image ‘layers’ - but designing your own, not downloading someone else’s!

Here’s a pencil figure sketch laser-cut onto wood. This one’s 3mm poplar plywood:

This one is on 3mm birch plywood, which is harder wood & needed very different settings. This still needs some of the soot cleaning off somehow - maybe start with fine sandpaper around a wooden block? I need to test waxes & stains on some waste material . . . I think birch has a warmer colour, though poplar gives a strong contrast & doesn’t need cleaning up. Birch is only slightly more expensive.

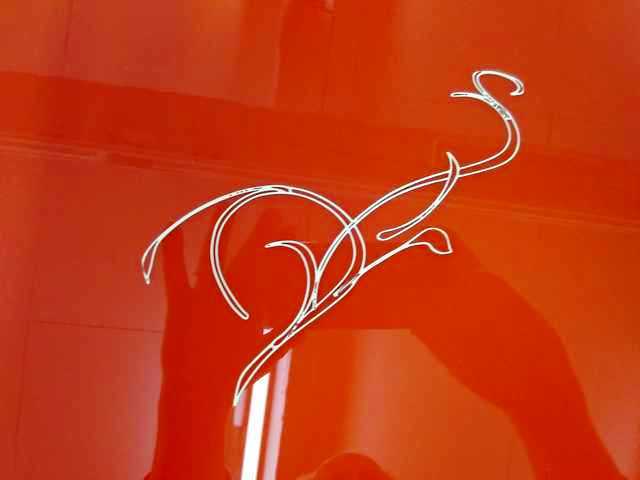
Finally, here’s the same image on clear acrylic sheet, to the edge of which I plan to fix 1 or more blue LEDs:

More paper cut samples . . .


Here’s another, but look at the really detailed slender bit that was completely cut out & effectively lost. At least it shows how intricate the machine can cut, if the image has been designed properly.

This Kickstarter project is offering user-configurable lampshades. It’s interesting to see the way they’re made, with a series of fins made from acrylic sheet, fixing into slots around the perimeter of a top disc in clear acrylic. Now, there’s an idea . . . .
https://www.kickstarter.com/projects/1217380311/anylamp-design-your-own-lamp?ref=recommended
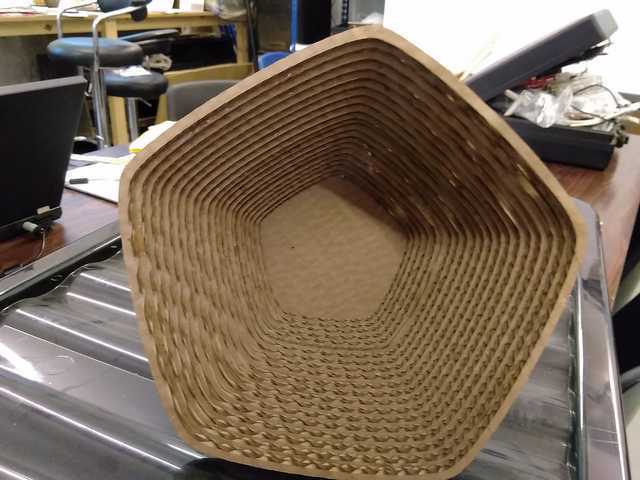
Forgot to post this pentagonal bowl the other day . . .
1 Like
And this pointy star one . . . .
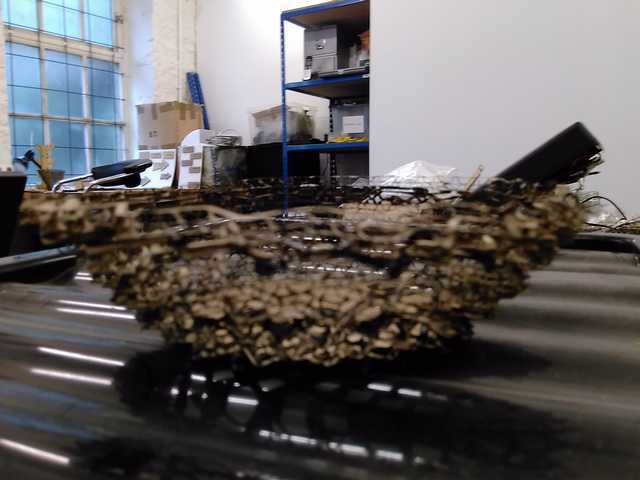

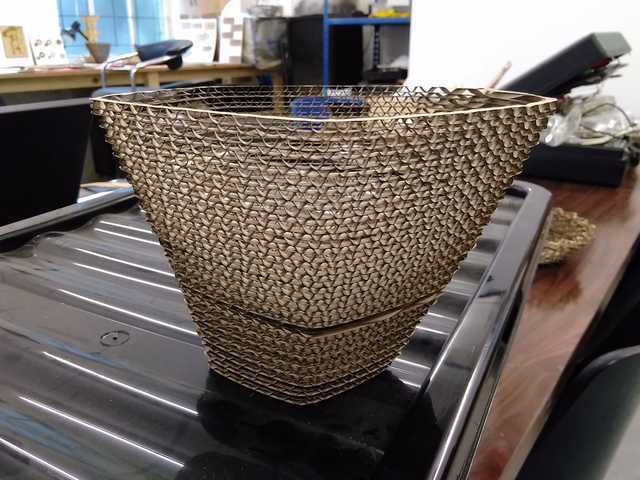
Here’s a vertically sliced one that took up nearly 2 whole sheets of cardboard 600 x 400 mm. It still needs a whole load more in the middle to look right, & to stand upright. The slicing could be a lot more efficient - there looks to be free 3D design software that may help to design a form, then work out all the slices, which is worth investigating.

A lot of information related to laser-cutting is now available on the wiki page: http://wiki.bridgerectifier.org.uk/Laser-cutting
I’ll cross-check it against other notes & refine it further ASAP.
H @RoboGuy, that’s great, thanks for adding this. Wondered if you’d seen this page also, though:
http://wiki.bridgerectifier.org.uk/Laser_cutter
It’s linked from the wiki homepage -> Tools and equipment -> Laser cutter.
Logic being that the laser cutting is more tools/equipment than a project, with the latter being things we make with tools and equipment.
It’s all open to interpretation, of course, but we should probably define some guidelines for “wiki farming”. Good thing is that the content is up and restructuring where deemed appropriate is fairly trivial.
Before adding to a wiki it’s generally best to have a good browse around the existing content to see how it’s structured, so as to avoid it ending up being a bit all over the place.
It’s part personal taste I guess, but would suggest we keep stuff on tools and equipment under there, with Projects for things that we build as a group. Here the 3D printer could be either, but I’d suggest it should be more of a tool than a never-ending project  Actually, @paul123 does seem to have made a lot of progress with this …
Some images from a recent 3mm birch plywood project I’ve been working on that began in Illustrator and finished with wood stain and varnish.
Settings for engrave lines: S=90, P=25, CP=22. Cut lines: S=16, P=60, CP=54.


1 Like
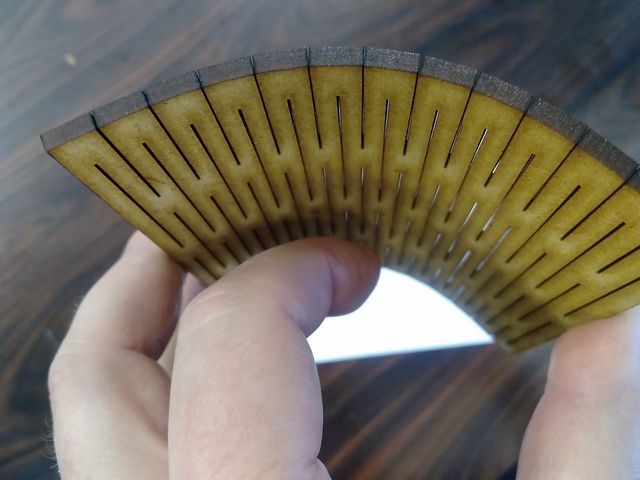
Just cut my first ‘living hinge’ sample out of 3mm MDF.

Want to explore cutting wider pieces - something that could be formed into a complete cylinder - and different patterns for aesthetics. Also need to compare outcome for plywood & acrylic sheet (more rigid than MDF?), and different thicknesses of material . . . .
The method’s quite simple after installing a special ‘extension’ for Inkscape. Will document for others after testing a few alternatives. Now, about that lampshade . . . .
1 Like
In the first attempt, I didn’t pick up that the piece resized itself when loaded onto the laser-cutter PC, so the gap sizes weren’t what was originally set.
In this 2nd attempt, I used default settings of ‘y’ line length 19mm, ‘y’ gap size 3mm, ‘x’ separation 1.5mm. The rectangular outline was created as 100mm wide (x) by 75mm high (y), before selecting Extension > Render > Living Hinge, and accepting the 3 default settings above. That’s all there is to it, before Path > Object To Path, & re-saving as DXF. After loading on the laser-cutter PC, I was careful to re-size to 100 x 75mm before cutting.
The back of the piece doesn’t have any of the scorch marks, but isn’t particularly interesting:

The front has some scorching, but (at this scale) it seems to give the whole surface a warm glow:

Bearing in mind this piece is only 100mm wide, I’m impressed that it can be bent into a semi circle - so maybe 200mm and larger could be formed into a tight cylinder (at least for 3mm MDF):

1 Like