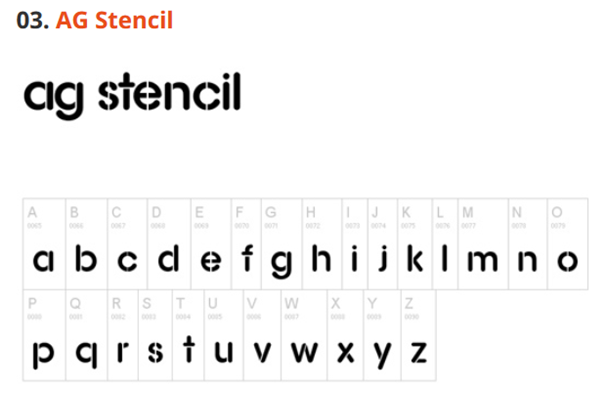
For info, here are the stencil fonts I found that provide mixed case, and offer potential for cutting all the way through the sheet material. In my signage test, I’ve used Stardos, but may try AG Stencil. I found them from: 25 top free stencil fonts | Creative Bloq
:
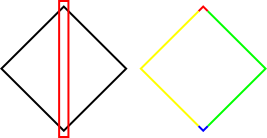
From what I understand, you’ve pretty much done everything you need. “Cut path” won’t delete anything from the diamond shape, but it will cut it into 4 different sections. After you’ve cut the path (once you’ve set up as in your screenshot) you should end up with 4 paths as in the right hand side of following image (I’ve added colouring for emphasis):
Removing the “blue” and “red” paths should leave you with what you’re wanting.
Looks like a lot of great progress being made. Wonder if some of this could be captured on the wiki? Much easier to locate in future that way, then having to trawl through forum posts with unrelated titles.
Made some progress tonight with new members/ potential members.
Due to problems installing Inkscape on Apple Mac, Tony paid £9 for Easydraw, installed that, & created a simple outline drawing, which he fetched along as DXF format on USB stick to test. We loaded it onto the laser cutter PC, & ran as a drawing, then as an outline cut-through image. It all worked fine, so Tony knows he can create anything else & cut it ok. He’s interested in buying some transparent polypropylene from www.kitronik.co.uk & starting to experiment.
Frances brought along an image on USB stick, which I loaded, selected & Path > Trace Bitmap. I tried moving the ‘top’ image to the area being saved for laser-cutting. The DXF file was tiny at only 5kb, so maybe comprised only the outline rectangle we added? We tried loading the top and the lower image (as separate file), but it wasn’t recognised.
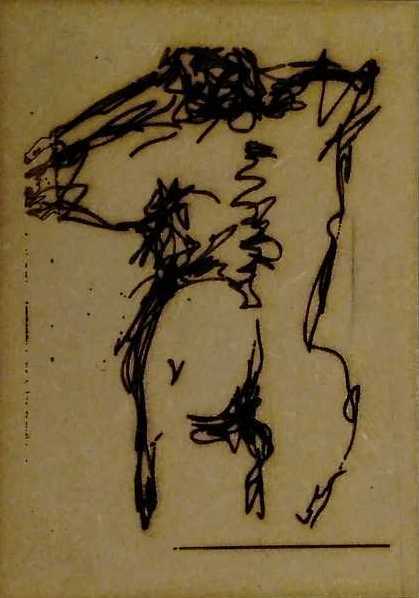
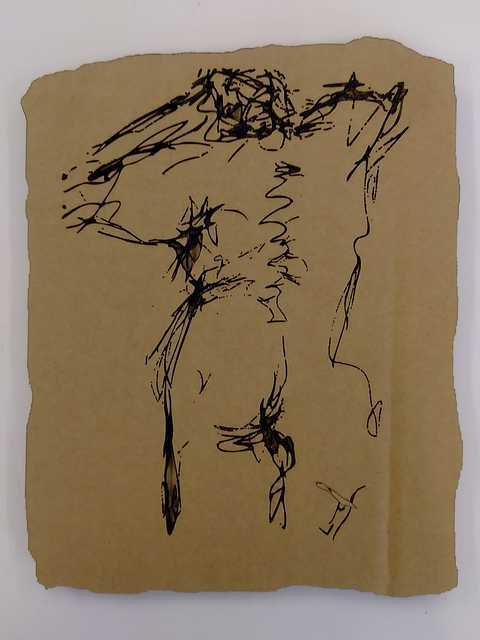
Finally, Sally tested loading 1 of my JPG scanned sketches, & following the same procedure, including ‘Remove Background’ with Path > Trace Bitmap. We selected the paler of the 2 images after tracing/ We also selected Path > Simplify Path to reduce the file size (initially over 10Mb then down to 2Mb). We cut this at 11cm high, whereas the previous versionw as 20cm. The cutting lines are quite dense, and some lines still need cleaning off the source image, but it produced a strong image . . . .
I’ve split all these topics off about learning to laser cut to a new topic with a more representative name.
Also these mega-threads can get bit slow to load, and difficult to navigate and remember where stuff is. So before adding to one such as this, worth considering if a new topic is in order. E.g. we could have threads about wax filling, safely cutting card, making living hinges and so forth, rather than one gigantic thread.
It is a bit of a balance, as at the same time it’s best to avoid splitting stuff over too many threads and the forums getting cluttered, but just worth considering before posting.
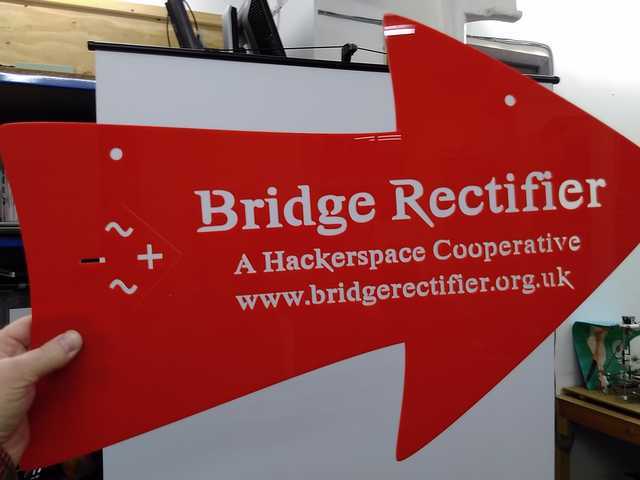
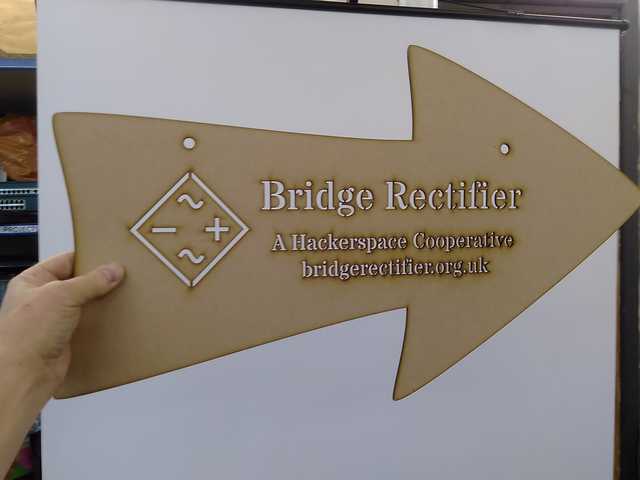
Finally got things sorted enough to cut a full size sign tonight - 590mm wide.
Annoyingly, the outline of BR’s logo cut through, but only as a very thin line. I need to increase its ‘stroke’ width before cutting any more signs. I plan to hang this in the middle of the building, next to BR’s corridor. I’ll create a sign shaped like a very wide ‘up arrow’ to hang just inside the main entrance. @Freddie suggested I load the sign in github, so we keep track of these ‘resources’, and improve them progressively.
Excellent idea. I’ve just created a signage repository for stuff like this. Suggest having a directory per sign/notice, with the original design files, DXF exports and any notes etc. in each.
@RoboGuy if you could let me know your GitHub login, I’ll set you up with access.
Later checking showed it’s the image underneath that has been transformed, so delete the top image that you’ve dragged out of the way. Depending on the detail of your image, with mine I can tell the 2 apart because the original is darker & shows more detail/ subtlety of tone.
It’s only at this stage that I can see horizontal line at the bottom of the image - caused by scanning from a paper copy. To remove this, select the Node tool (2nd down on the left column), which displays all the individual nodes making up the end of each separate line. In my case, I want to delete a horizontal line, & need to select nodes at either end. So, I select the left most node, then hold down & click on the right most node. Then press delete to delete the entire line. It was a bit of trial & error, and I found it wasn’t 1 long line but 2 shorter ones, which each had to be deleted. There are various options for working with nodes/ sections between nodes - see all the blue dotty icons at the left, going across under the menu bar.
Just try with an image of your own. Don;t forget to do Path > Simplify to reduce the number of lines & cutting time, and to put a border around your image. I want to test a wavy outline, instead of a rectangle, by using the freehand drawing tool . . . .
Made some more progress on 2 signs, which I’ve left out in the space for members to inspect.
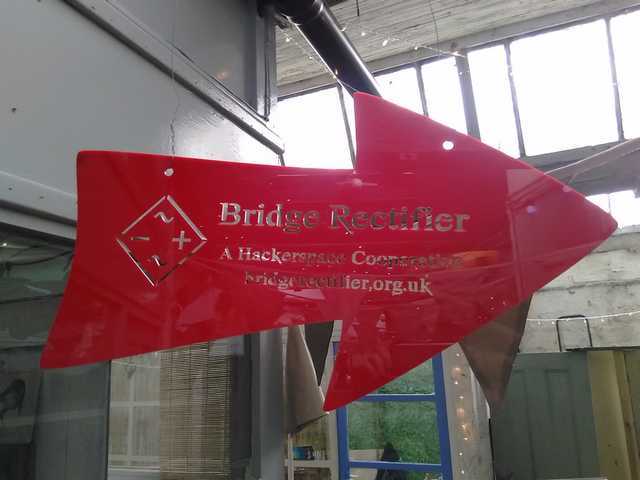
Here’s the big arrow one (for the end of the corridor), cut full size (590mm wide), now with proper logo outline. I’ll probably raise the right hand hanging hole, so that wire doesn’t obscure much of the sign, Otherwise, I think it’s ready to cut on red acrylic sheet, unless anyone has any comments? Any thoughts, @9600, on whether the logo outline will bestrong enough in acrylic sheet to support the central area, with just about 2mm at top & bottom, or whether the gap needs to be bigger?
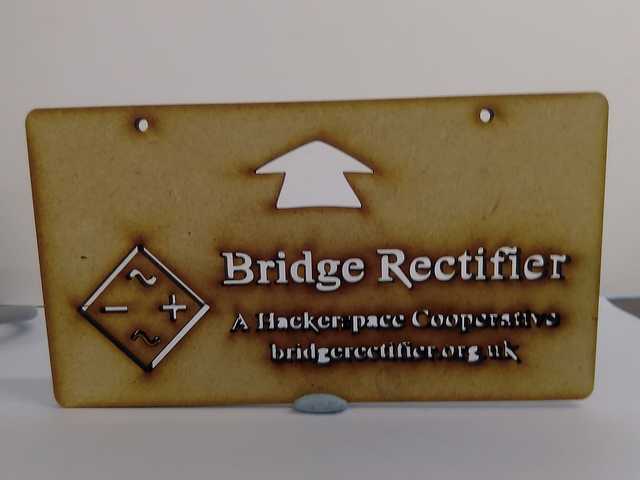
This rectangular sign is for just inside the entrance. Only done it 150mm so far. I’m not sure about the arrow proportions. so happy to take feedback
For info, I’ve documented all the steps for editing BR’s logo (quite convoluted), & will put a doc on the wiki when I figure all that out.
Regarding reproducing images, I cut my test figure drawing out of corrugated cardboard. The image lines were cut with Speed 20/ Power 20/ Corner Power 15; outline cut through with 12/ 40/ 30. It’s burnt right through the card for some tiny pin pricks, & through the top layer where lots of lines converged, but it actually gives it an interesting quality. Rather than a conventional rectangular border, I used the ‘draw freehand lines’ tool in Inkscape to give it an irregular edge - like the deckle edge in printmaking. I could have done without the vertical crease in the card, but it was only a test piece.
On the signage, I’ve just concluded it will be best to split the logo outline into 4 diagonal lines, each made from a separate path, rather than 2 pairs as currently. So, I’ll cut across the path horizontally too.
Regarding the ‘up’ arrow on the rectangular sign, instead of cutting through, would it be better to cut a ‘vector score’ line & fill with contrasting coloured wax? I’ll order some & experiment.
Rub in and then polish off with 3-in-1 oil. Think it sticks with line widths up to about 1mm or so, beyond which we found it would not take very well and fall out.
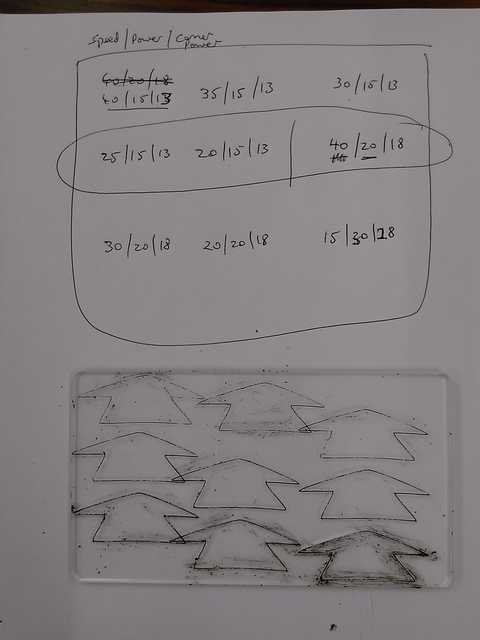
I want to create a red rectangular sign for just inside the building entrance. This will have an ‘up’ arrow, which I’m wondering about cutting as a line, then filling in with black wax. I did this trial on transparent acrylic, with different speed/ power/ corner power settings to test the difference. I’m wondering about any from the middle row, or the bottom left . . .
Clarifying what materials can & can’t be cut, I think the machine referred to here is probably like ours:
“they cannot cut through metals, even very thin metal or hard materials like stone or glass, but they can mark and engrave into them. The laser also cannotcut or engrave into any material containing Chlorine, ie: PVC, Vinyl, fake or PU leather and some coated patent leathers, as when cut or engraved, the vaporised material releases deadly Chlorine gas, which turns to hydrochloric acid when mixed with water vapour in the air, causing great damage to the machinery (and our lungs!).”
As some potential members are interested in intricate paper cut designs, I tested out the method. I downloaded a 2-tone image from t’interweb, the used Path > Trace Bitmap with settings of ‘Edge detection’ and ‘Brightness steps’ = 2.
Some of the finer detail was lost, possibly because the image was too detailed for 21 cm high that I selected. I tried on card, but havent made a note of the settings other than on a piece at the space. Promising first attempt to show potential . . . .